Types of electric hot water heaters
There are two types of electric hot water heaters: Instantaneous and Storage. The Instantaneous heater heats up the water as it is needed, which means that if you need more hot water than the heater can provide, then you will have to wait for the water to heat. Storage electric hot water heaters store a certain amount of energy in order to produce hot water when needed; however, this means that the water will be hot for a while after it is turned off.
It is important to remember that electric hot water heaters must always be installed by a licensed professional. You can also use a heat pump or water heater in order to save energy. A heat pump uses electricity to move heat from one area of the house and put it into hot water.
The most important thing that you can do to protect your hot water heater tank is to make sure that it is in a safe place. You should never put the heater near anything flammable, such as paper or wood. If the heater is in a place where it could be knocked over, you should find some way to secure it.
Size and capacity of electric hot water heater
When choosing an electric hot water heater, you will need to consider the size and capacity of the unit. You will also need to check your state’s regulations on what unit sizes are allowed. Another factor to consider is how many people will be using the hot water system. If there are only two people in the home, a small electric tankless water heater may be sufficient. However, if there are more people in the home, you will need a larger unit.
Electrician installation is required for all-electric water heaters. There are two main types of gas hot water systems- instantaneous and storage tanks.
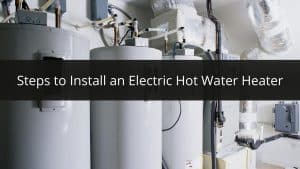
Steps to Install an Electric Hot Water Heater
Installing an electric hot water heater or replacing a water heater is a fairly straightforward process that most people can do themselves with a little bit of instruction. The following are the basic steps you will need to take in order to install your new electric hot water heater:
– Remove the old water heater, if there is one
– Shut off the main valves (shutoff valve) for gas and water
– Connect the incoming water supply
– Install the vent hood (draft hood) and flue pipe wrench
– Connect the gas attachments, such as the pressure relief valve and drain pipe
– Turn on the main valves for gas and water
– Turn on the hot water faucet
– Check for leaks and make any necessary adjustments to ensure a proper installation
– Turn on the power to the water heater
Step 1: Build a Platform for Hot Water Heater
The first step in installing an electric hot water heater is to install (water heater installation) the platform for it, which will provide a stable surface for it and make sure that you have enough room for the heater.
There are many ways to do this:-
1)Make a platform starting with wood or concrete blocks that are larger than its final size, or use scrap plywood.
2) Buy a platform that is designed to be placed on top of the water heater and then covered by your existing flooring.
3) Set up with a wooden shelf or a platform made of concrete.
Step 2: Place the Tank in the centre
After assembling the blocks, the next step is to centre the tank on top of them. Make sure that the drain faucet is facing forward and that the tank rocks back and forth slightly so that it can stay level.
Step 3: Soldering Basics
Soldering copper tubing is a very easy skill to acquire. In order to do so, you will need lead-free solder, flux, and a soldering iron. The mating surfaces of the copper tubing and fittings must be clean and free of oxidation. Once they are clean, cover them with flux and use the soldering iron to heat the solder and join the surfaces together. Use a tubing cutter, not a saw, to cut the tubing for the cold water entrance line on the tank.
– In order to install an electric hot water heater, start by heating the fittings with a torch flame.
– It’s more convenient to use a soldering flux that cleans without damaging components.
– The flame should be kept directly on the joint when heating it in order for the solder to melt properly.
– Keep heating until the flux melts and burns out; then, the installation is complete!
Step 4: A regulating valve.
The T&P valve is a safety measure that is fitted on top of the hot water tank allowing the water in the tank to escape if the pressure builds too much. In order to install a T&P valve, you need to take 4 inches off of your measurement and then install the valve into the tank accordingly. Additionally, in order to install an electric hot water heater, you need to know your tank’s internal volume as well as the voltage of your electric source.
Finally, in order to install a relief valve tube, you need to measure its length in relation to the tank’s diameter and then make sure that it is threaded on the correct side.
Step 5: Electrical Power
In order to complete this project, you will need to have a joist-mounted electrical junction box, a circuit breaker, a circuit cable that is stapled in place every 2 ft, and a breaking off the top of the tank. You will also need to connect to a joist or piece of blocking.
Now it’s time to get the electrical power ready. First, pull the cable out of the bottom of the pipe. Make sure you have enough slack in the wire so you can work comfortably. Then, slide the conduit into the connector and tighten it with a screw. Finally, place a covering plate over the top of your completed installation to hide any visible wiring from view. Now it’s time to install your electric hot water heater!
What are the necessary materials and tools for the installation?
You will need the following materials to complete this project:
1. Electric hot water heater
2. A hacksaw
3. A tape measure or ruler that measures in feet and inches, and/or a tape measure that measures in millimetres
4. A pencil or pen
5. A drill with bits and screws to fit your conduit connectors
6. Conduit (pipe)
7. A drill bit to fit your conduit connectors
8. A wire stripper
9. Electrical tape (optional)
10. Screwdriver bits or screwdriver set with Phillip’s head and flathead screwdrivers.
11. A level that can be set on the wall or floor, so you can check if it’s straight (optional)
12. Safety goggles
13. A bucket to catch the water that may spill during your installation
14. An extension cord, if necessary (optional)
15. A stud finder or a hammer and nail, if you’re working with a wall-mounted tank